
The Bobble-licious Bag is an adorable crochet pattern that uses the bobble stitch to create a great purse, perfect for dress up and play time. The bag itself is worked in the round and the straps are added later. It measures about 8 inches by 6.5 inches, and the straps can be whatever length you prefer. This free crochet bag pattern also includes directions on how to add a lining, which is also optional. The decorative ribbon bow adds the perfect finishing touch.
Bobble-licious Bag
This image courtesy of speckless.wordpress.com
Materials:
• Worsted yarn
• 5mm hook
• 5.5mm hook
• Large blunt tapestry needle
• Ribbon
• Fabric
• Sewing needle
• Thread
• Sewing machine (if you want to line your bag)
Here is a graph of what the first round (the bottom of the bag) will look like:

Instructions:
Row 1 With 5.5mm hook, ch 26. Make beg bobble in third chain from hook (do not chain 3 for this one—starting in the third chain from the hook counts as your ch 3). Ch 1, skip next ch. * Make bobble in next ch, ch 1.* Repeat * to * until the last chain. Make two more bobble, ch1 groups in last chain (see graph). Spin your work so that the completed bobbles are facing you. You will now crochet into the other side of the chain (you are now crocheting in the round). *Bobble in same ch as next bobble, ch 1.* Repeat * to * around to first beg bobble. Make another bobble in the first chain (so each end has 3 bobbles). Join with a sl st to top of beg bobble. (26 bobble stitches)
Row 2 Sl st into first spc. Make beg bobble, ch 1. *Bobble in next ch 1 spc, ch 1.* Repeat * to * around. Join with sl st to top of beg bobble.
Row 3-6 Repeat round 2
Row 7-8 Change to 5mm hook. Repeat round 2.
Row 9 Sl st to first ch 1 spc. Ch 2 (counts as first hdc), hdc in same spc. Make 2 hdc into each ch 1 spc around. Join with sl st to top of first ch 2.
Row 10-11 Ch 2 (counts as first hdc). Hdc into each hdc around, decreasing 2 evenly around (Meaning, you will only make a total of 2 decreases in this round — just make sure they’re not right next to each other). Join with sl st to first ch 2.
Row 12 Ch 3 (counts as first dc). Dc into each hdc around. Join with sl st to first ch 3.
Row 13 Ch 2 (counts as first hdc). Hdc into each dc around, decreasing 2 evenly around (Meaning, you will only make a total of 2 decreases in this round — just make sure they’re not right next to each other). Join with sl st or invisible join to first ch 2. Cut yarn and weave in ends.
To make strap:
• Lay your bag body flat and find the center side stitch. Join your yarn two stitches to the right of the center side stitch. Make 5 sc into bag side. *Ch 1, turn, sc into each of the five sc below.* Repeat * to * four times (until you have five rows total).
• Decrease one sc (this will be ch 1, insert hook into first sc, yarn over, draw up a loop, insert hook into next sc, yarn over, draw up a loop, yarn over, draw through all 3 loops on hook). Sc in next sc. Decrease one sc. (3 sc)
• *Ch 1. Sc into each of the 3 sc below* Repeat * to * until your strap measures half of what you want the length to be. Finish off and cut yarn, leaving a sewing length.
• Repeat first 3 steps to make the other side of the strap. Using yarn ends, sew the strap halves together with a whip stitch. Knot and weave in ends.
Finishing:
• With right side facing you, join yarn in any hdc on top of bag body. Ch 1. Sc evenly around bag body opening as well as strap. Join to first sc with sl st or invisible join. Cut yarn, weave in ends. Repeat for other side
• Cut a long length of ribbon. Pin a safety pin to one end of the ribbon and use it as a guide to weave in and out of the double crochets from round 12. Tie a bow, trim the ends, and apply Fray Check (if desired). I also sewed a little stitch in the center knot of my bow to keep it in place.
You can stop here, or you can make a lining for your bag. Here’s how I did mine:

First, I traced around the bag. Then I added a quarter inch seam allowance to the tracing before cutting it out.
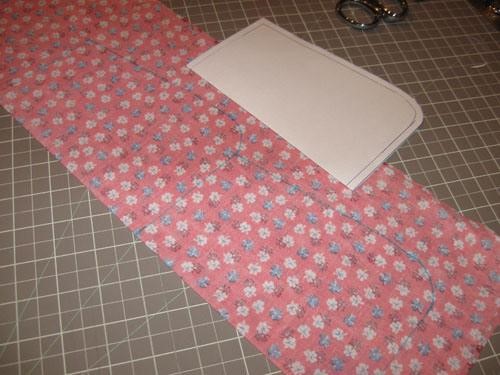
To lessen the amount of tracing I had to do (which I hate), I ironed my fabric in half (right sides facing). Then, I folded my paper pattern in half and traced around it on the fold. You will need four lining pieces made from this pattern (my fabric was only pretty on one side, and I wanted it to look nice from the inside and outside).

Iron your lining pieces. Pin each pair together, right sides facing. For the first pair, stitch around the sides and bottom of the lining with a quarter inch seam. For the second pair, just sew the sides and part of the bottom (leaving a couple inches open at center bottom). It’s easiest to start each of the seams on this pair on the bottom and move out to the top sides. Oh, use quarter inch seams for this pair also. After sewing the seams, turn your first lining (the one without the hole) right-side-out (shown in that bad picture up there). Shove this inside the other lining so that the right sides of both are facing each other. Pin together, matching up side seams. Using a quarter inch seam, stitch the tops of the lining together. Then, pull everything right-side-out through the opening that you left in the lining. This is what it looks like:

Once everything is right-side-out, sew the opening on the bottom of the lining shut. Make sure the lining piece with the completely finished bottom (the one that didn’t have the turning hole) is inside (you won’t see the hole you sewed shut through the bag). Press the top seam, and top stitch around the opening, very close to the edge.

Now sew the lining into your bag.
