Categorie archief: Alleen in het Engels

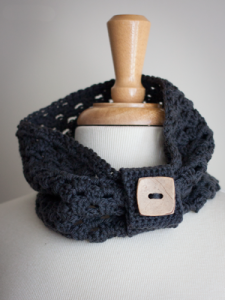
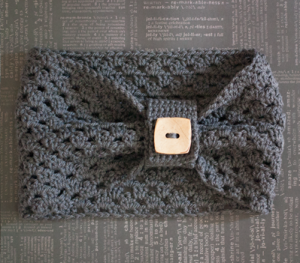
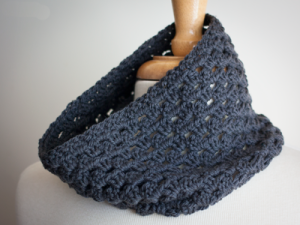
Crochet cowl

{free crochet pattern}

col-grijs1

Stitch glossary:
Ch – chain
Sc – single crochet
Dc – double crochet
sl – slip
sk – skip
beg – beginning
t-ch – turning chain
St(s) – stitch(s)
col-grijs3

Sizes: One size fits most
Measurements: 8″ high x 27″ circumference
Yarn: Wooly, 95 yards
Color Charcoal, 2 skeins
Crochet Hook: Size K, 6.5mm
Supplies: 1.25″ button, yarn needle
Gauge: 5 dc clusters over 4″.

Begin tab:
Chain 10.
Row 1: Work 1 sc in second ch from the hook and in each ch across. 9 sc made.
Row 2: Ch 1 and turn. Work 1 sc in each sc across.
Repeat Row 2 until piece measures 5″ from the beginning.
Next row: Ch 1 and turn. Work 1 sc in first two sc, ch 5, skip next 5 sc, 1 sc in last 2 sc.
Next row: Ch 1 and turn. Work 1 sc in first two sc, work 1 sc in each ch, 1 sc in last 2 sc.
Work 3 rows as for Row 2.
Finish off. Attach button at the end opposite the buttonhole.

col-grijs2

Crochet cowl:
Ch 67, join with sl st to first ch to form a ring being careful not to twist chain.
Round 1: Ch 3, work 2 dc in same ch as sl st, sk next 2 chs. *Work 3 dc in next ch, sk next 2 chs.* Repeat from *to* around. Join with sl st to beg ch-3.
Round 2: Ch 3 and TURN. Work 2 dc in sp between t-ch and first 3-dc cluster.
*Work 3 dc between next two 3-dc clusters.
*Repeat from *to* around.
Join with sl st to beg ch-3.
Repeat Round 2 another 13 times or until nearly out of yarn.
You should have 14-15 rows total.
Fasten off and weave in all yarn ends.
col-grijs4

Crochet Shell Headband

image014
Abbreviations
– CH = chain
– SL = slip stitch
– DC = double crochet
Materials
– Yarn: 4-ply, worsted weight yarn. I used Caron Simply Soft in Soft Pink (where to buy))
– Hook: H (5.0 MM)
Headband Measurements
– Newborn 13?
– 3-6 months 14?
– 6-12 months 16?
– 12 months-tween 17.5?
– Adult 18?

Headband Measurement
The Pattern
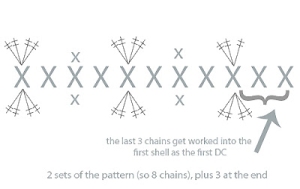
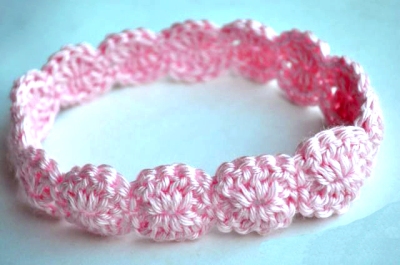
Chain to the length desired, but it must be divisible by 4, then add 3 chains at the end. For example, I wanted to make one for a 6-12 month old baby, so I chained 44, then added 3 at the end, for a total of 47 chains. The example below is for a newborn.

Make sure your chains are nice and loose because you will work on the top and bottom of them.
Make a Chain for the Headband
image002

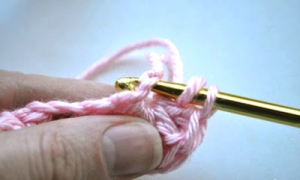
– In the third chain from the hook, work 3 DC in the same CH.
– Skip a CH, and work a SL in the next CH.
– Skip a CH, and work 4 DC in the next stitch.
– *Skip a CH, and work a SL in the next stitch.
– Skip a CH, and work 4 DC in the next stitch.*
– Repeat from * to the end, making sure to end with a shell (4 DC).
– Turn your work around, and see pictures below for continuing on the bottom. Work the first shell into the same chain (but on the bottom) of where you worked the last shell on the top.

image005

After working the last shell on the top, turn your work around and work another shell in the same chain.
image006

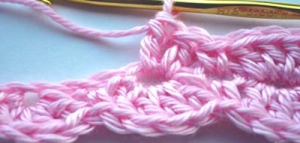
Here’s what your headband should look like once you’ve turned it, worked a shell on the end, and started to continue around.
image008

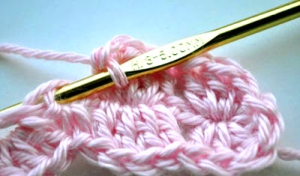
Here’s a close up of how you work the other side of your headband on the bottom. You create a new shell from the shell below it.
image011

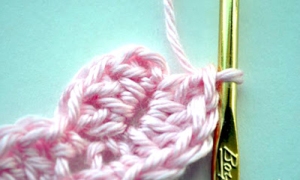
The last shell and end should look like this – one shell on the top, one on the bottom.

image012

Join the last shell to the first one with a SL. Fasten off and sew in the ends, leaving a tail to sew the headband together.

image014

Tasjes voor in de kast

klein-tasje
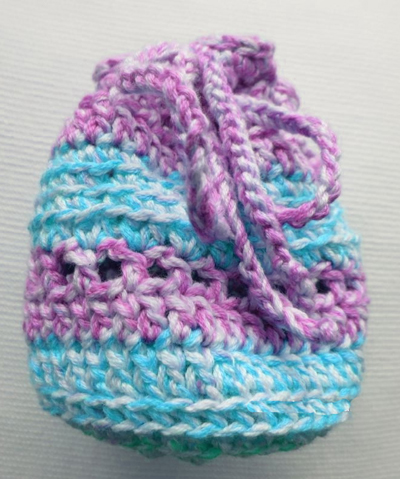
Vul de tasjes met in gaasdoek gestopte lavendel.
En je kleren ruiken geweldig.
Some info
I used small pieces of leftover yarn so i had to do a lot of weaving in yarn ends, but it is a small and fast project. use any yarn you like with a matching crochet hook size and it is up to you to make the pouch in one color or as many colors you want. my yarn was punto fancy color of schachenmayr nomotta with crochet hook size 4.0 mm
used stitches (american terms)
ss = slip stitch
ch = chain stitch
sc = single crochet
h dc = half double crochet
dc = double crochet
tr = treble crochet

Hire is how you can make the pouch
start with a magic loop
klein-tasje-top
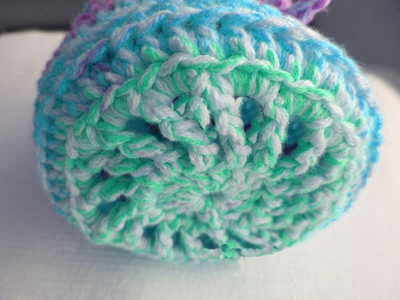
row 1. 3 chains, 15 dc into the ring, close with a slip stitch into the top of the starting chain
row 2. 6 chains (is first tr and 2 ch), *1 tr in the next dc, 2 ch*, repeat between * and * until end of row, close with a slip stitch into the 4th ch of starting chains
row 3. 1 ch, 3 sc into the first 2-ch space and 3 sc into the all the other 2-ch spaces, close with a slip stitch into the first sc

little pouch bottom
klein-tasje-bodem
row 4. 1 ch, 1 sc into the same stitch as the slip stitch into the back loop only, 1 sc into all the subsequence stitches into the back loops only, close with a slip stitch into the first sc into both loops.
row 5. repeat row 4
row 6. 1 ch, 1 dc into the same stitch as slip stitch into the back loop only, 1 dc into all the subsequence stitches into the back loops only, close with a slip stitch into the first dc into both loops
row 7. repeat row 6 but crochet into both loops
row 8. chain 4 (is first dc and 1 ch), *skip 1 stitch, 1 dc into next stitch, 1 ch*, repeat between * and * until end of row end 1 ch, slip stitch into third ch of beginning chains.Â
row 9. 1 ch, 2 h dc into first dc, skip 1-ch space, *2 h dc into next stitch, skip 1-ch space*, repeat between * and * until end of row, slip stitch into first h dc
rows 10,11 and 12. repeat row 4
row 13. make 1 ch, 1 dc into the same stitch as slip stitch and into all the subsequence stitches, close with a slip stitch into the first dc
row 14, 15,16, repeat row 8
row 17. 1 ch, 1 sc into same stitch as slip stitch, 1 sc into first 1-ch space, *1 sc into next dc, 1 sc into next 1-ch space*, repeat between * and * until end of row, close with a slip stitch into the first sc
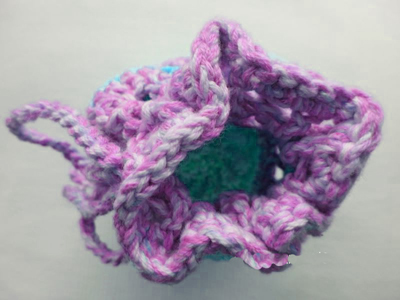
row 18. slip stitch into first and all the other stitches until end of row little pouch top weave in all ends crochet a cord of chains that is long enough to braid through the spaces of row 16 and to close the pouch.

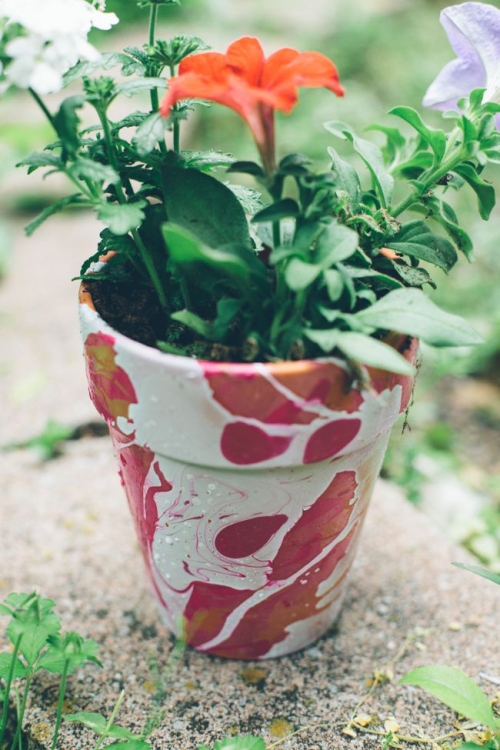
Nail polish marbled diy planters

Supplies:
-Planters. I used my old terra cotta ones but I’m pretty sure this would work on any surface.
-Nail polish.
-Big bucket of water.

image001
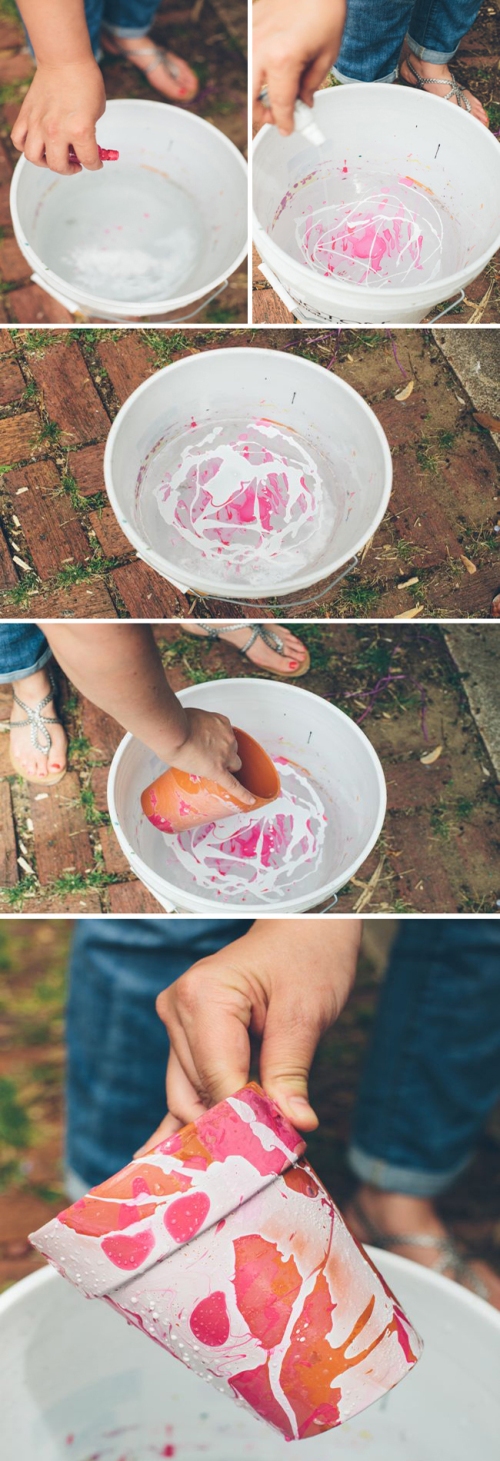
Step 1: Fill the a bucket about halfway with water and let it come to room temperature. It’s best to do this outside so you have good ventilation.


image033

Step 2: Liberally pour in nail polish. Let it spread out over the water as much as possible. You can help it move with a tooth pick or even just shaking the bucket a bit. The more surface area of the water you cover the greater coverage on the pot.

Step 3: Dip the pot in the water. I found it worked best to dip the pot on its side and let the polish wrap around the sides. If you don’t cover the entire pot in one dip, then dip again if you like.

image004

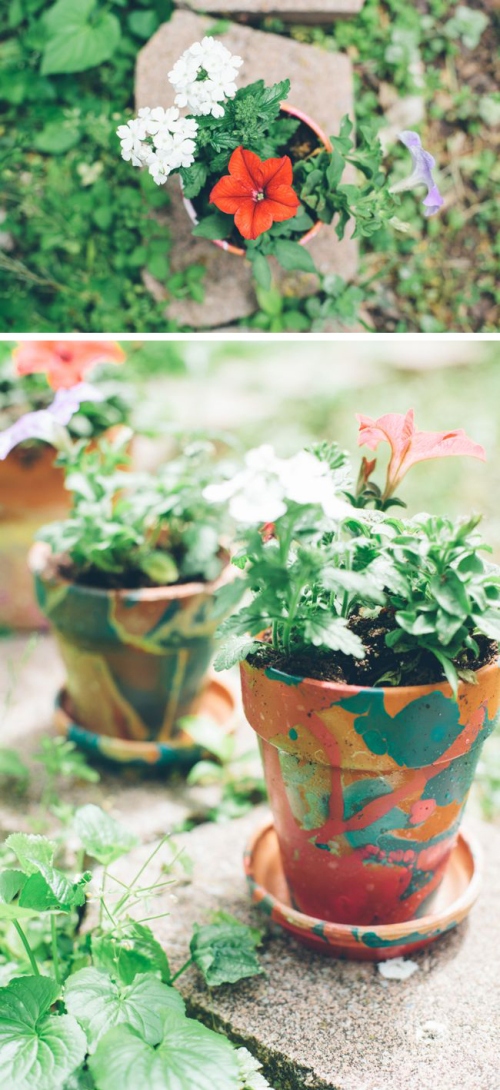
I love how each pot is different! Some colors definitely work better than others on this type of pot. Pink, yellow and turquoise were my favorites.

Gevonden op: hellonatural.co

Diy nail polish marbled eggs for easter.

My new favorite thing is nail polish marbling. Have you tried it?
The other day I decided to dip a few eggs like I did these glasses – and then proceeded to work my way through two dozen eggs.
It makes me seriously wish I had more colors of nail polish!

image001

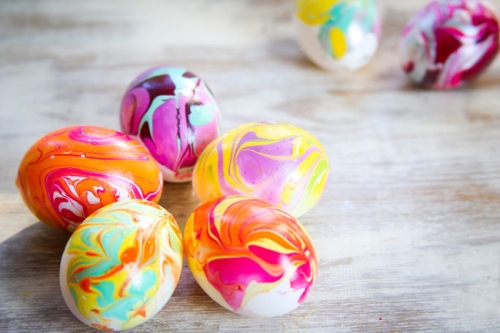
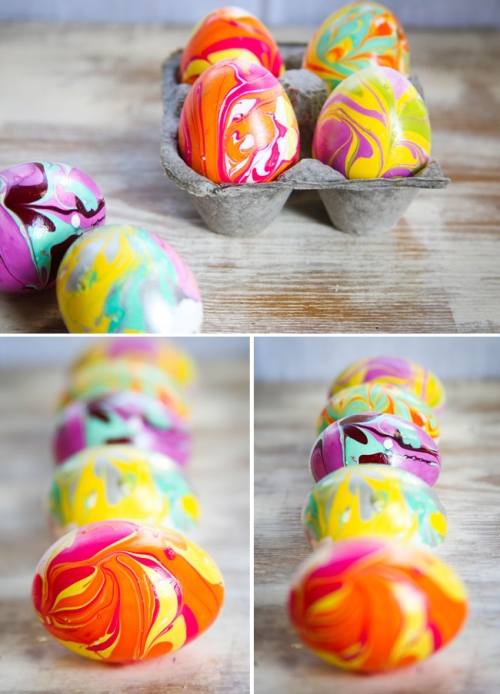
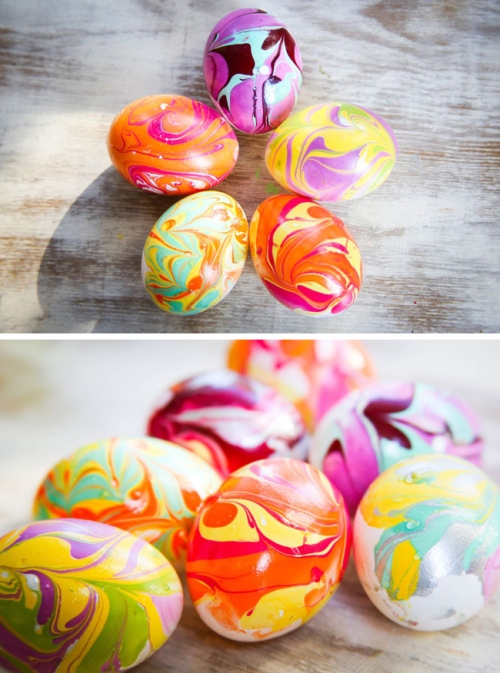
And then I had to take roughly a million pictures.
Because aren’t they just the coolest?

image002

To marble some eggs with nail polish here’s what you need:

image003
-Eggs. A lot of them. Because once you start you’ll want keep dipping.
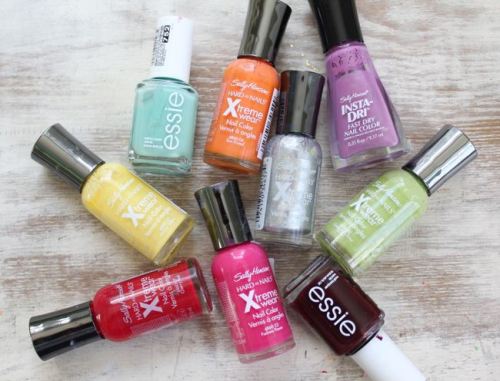
-Nail polish in all kinds of fun shades. My Essie polishes worked fine this time, I think because I wasn’t trying to make a specific design. And silver polish was amazing!
-A plastic cup filled with room temperature water. This is very important! If the water is too cold or too hot, the polish won’t work.
-Toothpicks.
-Nail polish remover. You’ll need this to get the polish off your fingers when you’re done.

image004

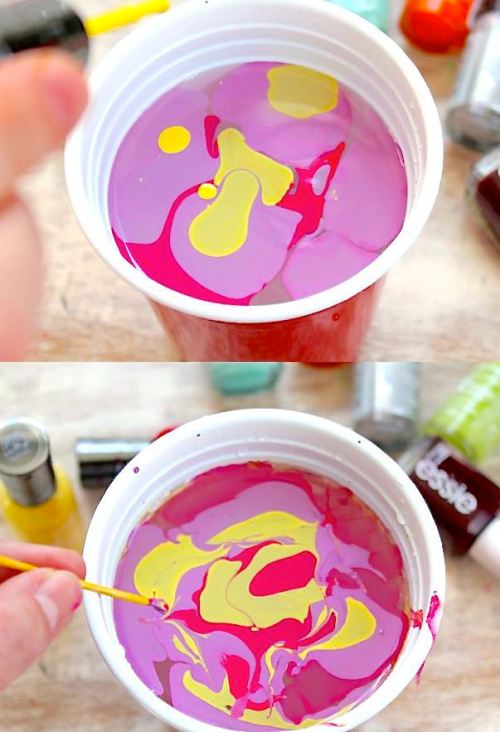
Drop lots of nail polish into the water. If it sinks, the temperature isn’t right. You want it to spread out over the top of the water. Have fun playing with colors! Then take a toothpick and swirl the colors a bit.

image005

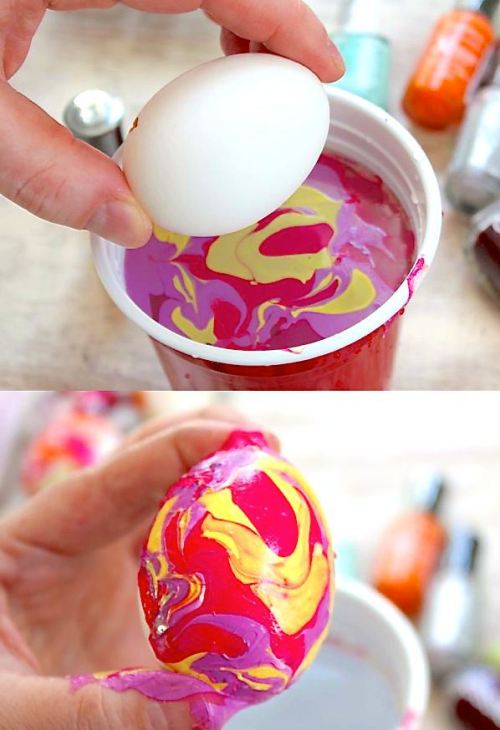
Hold your egg between your fingers so that you cover the least amount of surface area on the egg. Then dunk straight down into the water, hold for a second underwater and then bring it up. The polish will cover about half of the egg. Sit the egg in a carton or something and let it dry.
Have you decorated any eggs for Easter yet? I dyed some with the kids last weekend and it was really hard to share.

image006

Gevonden op : hellonatural.co

Art Deco Clutch

image056

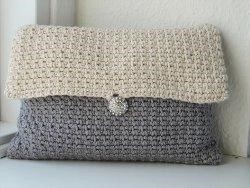
This simple Art Deco Clutch is a classic-looking clutch that’s the perfect size for errands around town. It’s big enough for your daily essentials including car keys, wallet, and cell phone. Using thin cotton yarn for this free crochet pattern will prevent the bag from becoming too bulky. The best thing about this pattern is that it’s easy enough for beginners to complete. Be sure to include the lining to ensure the bag holds its shape over time.

Materials:
-2 skeins KnitPicks Shine Worsted in cream and 1 skein in robot (grey). 50 g / 75 yrds – 69
m. 60 % Pima cotton – 40 % Modal.
-1 Button
-Fabric  47 cm x 28 cm    18½ inches x 11 inches. I used a very thin cotton fabric, so the bag didn’t become too bulky. ? yards in robot (grey).
-Hook  4 mm   US: G/6
-Sewing Thread  in grey and white
-Sewing Needle

Yardage     Total yardage: 220 m/241 yards. About  128 m/140 yards in beige and  92 m/101  Stitches  Chains and single crochets.
Finished size   width: 23 cm/9 inches    length: before sewing together: 43 cm/17 inches. Height after sewing together: 17 cm/6½ inches.
Instructions:
Start crocheting with the beige yarn.
Row 1    Chain 50.
Row 2   Chain 1, skip 1, 1 single crochet, [chain 1, skip 1, 1 single crochet]. Repeat 24 times between [ ].
Row 3    Chain 1, skip 1, 1 single crochet into chain stitch, [ chain 1, skip 1, 1 single crochet in chain stitch]. Repeat 24 times between [ ].
For guidance please see the crochet chart below. The chart only shows a part of the pattern and not the whole row across.
Repeat row 2 and 3 until work measures  3½ inches – 9 cm.
Change to grey coloured yarn and work until the grey part measures 6 1/4 inches – 16 cm.
Change back to beige coloured yarn and crochet until this beige coloured part measures 7 1/4inches – 18 cm.
In this last row make 7 chains in the middle as button holder.
Cut yarn and weave in ends.
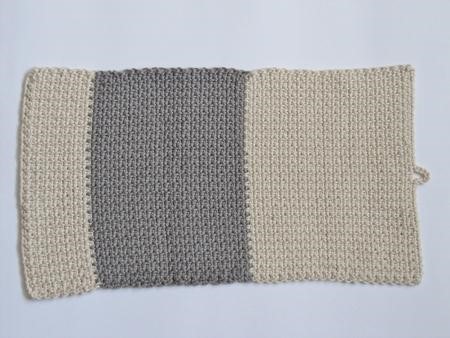
image057

image059

The work should look like the photo below.

image061

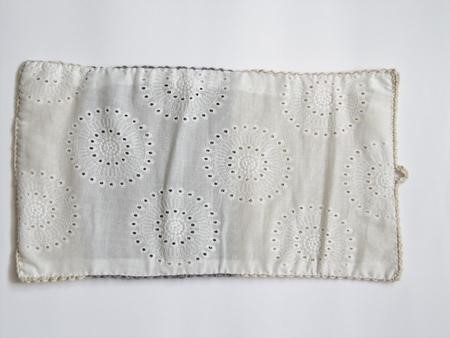
Cut the lining, so it is ½ inch/ 2 cm larger than the crocheted fabric. Pin the lining to the fabric and sew it by hand. Your work should look like the photo below now.

image063

Fold the fabric and sew it from the outside with beige and grey sewing thread.
Sew the button onto the fabric.

gevonden op: http://bynumber19.com/

Bobble-licious Bag


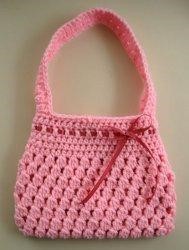
The Bobble-licious Bag is an adorable crochet pattern that uses the bobble stitch to create a great purse, perfect for dress up and play time. The bag itself is worked in the round and the straps are added later. It measures about 8 inches by 6.5 inches, and the straps can be whatever length you prefer. This free crochet bag pattern also includes directions on how to add a lining, which is also optional. The decorative ribbon bow adds the perfect finishing touch.

Bobble-licious Bag
This image courtesy of speckless.wordpress.com
Materials:
• Worsted yarn
• 5mm hook
• 5.5mm hook
• Large blunt tapestry needle
• Ribbon
• Fabric
• Sewing needle
• Thread
• Sewing machine (if you want to line your bag)

Here is a graph of what the first round (the bottom of the bag) will look like:

Instructions:
Row 1 With 5.5mm hook, ch 26. Make beg bobble in third chain from hook (do not chain 3 for this one—starting in the third chain from the hook counts as your ch 3). Ch 1, skip next ch. * Make bobble in next ch, ch 1.* Repeat * to * until the last chain. Make two more bobble, ch1 groups in last chain (see graph). Spin your work so that the completed bobbles are facing you. You will now crochet into the other side of the chain (you are now crocheting in the round). *Bobble in same ch as next bobble, ch 1.* Repeat * to * around to first beg bobble. Make another bobble in the first chain (so each end has 3 bobbles). Join with a sl st to top of beg bobble. (26 bobble stitches)
Row 2 Sl st into first spc. Make beg bobble, ch 1. *Bobble in next ch 1 spc, ch 1.* Repeat * to * around. Join with sl st to top of beg bobble.
Row 3-6 Repeat round 2
Row 7-8 Change to 5mm hook. Repeat round 2.
Row 9 Sl st to first ch 1 spc. Ch 2 (counts as first hdc), hdc in same spc. Make 2 hdc into each ch 1 spc around. Join with sl st to top of first ch 2.
Row 10-11 Ch 2 (counts as first hdc). Hdc into each hdc around, decreasing 2 evenly around (Meaning, you will only make a total of 2 decreases in this round — just make sure they’re not right next to each other). Join with sl st to first ch 2.
Row 12 Ch 3 (counts as first dc). Dc into each hdc around. Join with sl st to first ch 3.

Row 13 Ch 2 (counts as first hdc). Hdc into each dc around, decreasing 2 evenly around (Meaning, you will only make a total of 2 decreases in this round — just make sure they’re not right next to each other). Join with sl st or invisible join to first ch 2. Cut yarn and weave in ends.

To make strap:
• Lay your bag body flat and find the center side stitch. Join your yarn two stitches to the right of the center side stitch. Make 5 sc into bag side. *Ch 1, turn, sc into each of the five sc below.* Repeat * to * four times (until you have five rows total).
• Decrease one sc (this will be ch 1, insert hook into first sc, yarn over, draw up a loop, insert hook into next sc, yarn over, draw up a loop, yarn over, draw through all 3 loops on hook). Sc in next sc. Decrease one sc. (3 sc)
• *Ch 1. Sc into each of the 3 sc below* Repeat * to * until your strap measures half of what you want the length to be. Finish off and cut yarn, leaving a sewing length.
• Repeat first 3 steps to make the other side of the strap. Using yarn ends, sew the strap halves together with a whip stitch. Knot and weave in ends.
Finishing:
• With right side facing you, join yarn in any hdc on top of bag body. Ch 1. Sc evenly around bag body opening as well as strap. Join to first sc with sl st or invisible join. Cut yarn, weave in ends. Repeat for other side
• Cut a long length of ribbon. Pin a safety pin to one end of the ribbon and use it as a guide to weave in and out of the double crochets from round 12. Tie a bow, trim the ends, and apply Fray Check (if desired). I also sewed a little stitch in the center knot of my bow to keep it in place.

You can stop here, or you can make a lining for your bag. Here’s how I did mine:
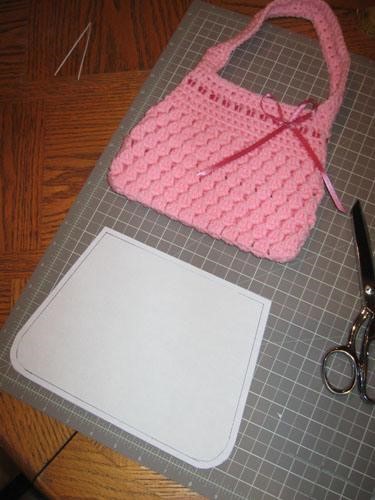
image006

First, I traced around the bag. Then I added a quarter inch seam allowance to the tracing before cutting it out.

To lessen the amount of tracing I had to do (which I hate), I ironed my fabric in half (right sides facing). Then, I folded my paper pattern in half and traced around it on the fold. You will need four lining pieces made from this pattern (my fabric was only pretty on one side, and I wanted it to look nice from the inside and outside).
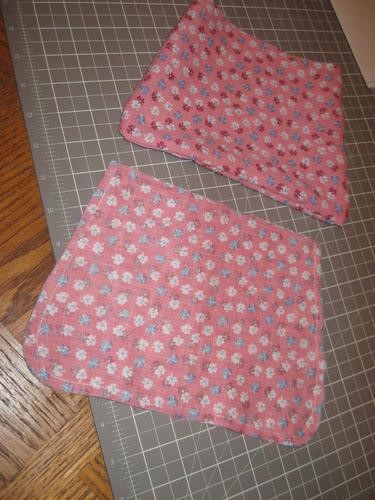
image010

Iron your lining pieces. Pin each pair together, right sides facing. For the first pair, stitch around the sides and bottom of the lining with a quarter inch seam. For the second pair, just sew the sides and part of the bottom (leaving a couple inches open at center bottom). It’s easiest to start each of the seams on this pair on the bottom and move out to the top sides. Oh, use quarter inch seams for this pair also. After sewing the seams, turn your first lining (the one without the hole) right-side-out (shown in that bad picture up there). Shove this inside the other lining so that the right sides of both are facing each other. Pin together, matching up side seams. Using a quarter inch seam, stitch the tops of the lining together. Then, pull everything right-side-out through the opening that you left in the lining. This is what it looks like:
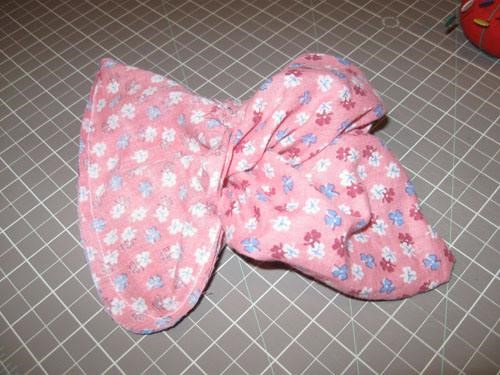
image012

Once everything is right-side-out, sew the opening on the bottom of the lining shut. Make sure the lining piece with the completely finished bottom (the one that didn’t have the turning hole) is inside (you won’t see the hole you sewed shut through the bag). Press the top seam, and top stitch around the opening, very close to the edge.
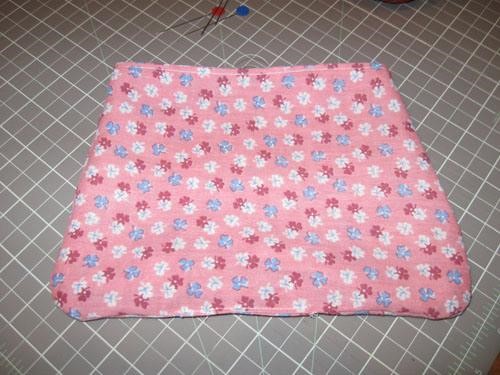
image014

Now sew the lining into your bag.
Pretty Purple Purse

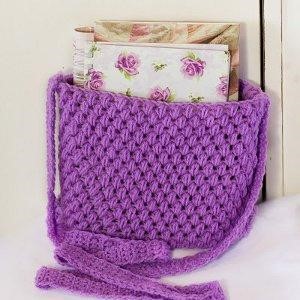
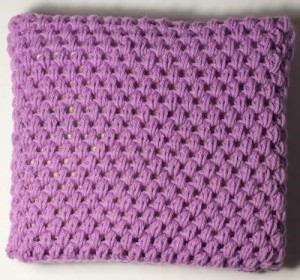
Ladies, treat yourself to a new bag with this free crochet pattern. The Pretty Purple Purse is a great addition to your purse collection. It’s the perfect size for everyday use. This casual looking bag is made using the puff stitch and can be made in any color yarn that you prefer. The pretty purple hue shown here is great for the spring and summer months.

image043

Materials:
• 4.50 Crochet Hook
• Tapestry or Wool Needle
• 8ply Yarn
• Scissors
• Measuring Tape

Finished Size:
Approximately 10×11 inches (25×27 cm)

Instructions:

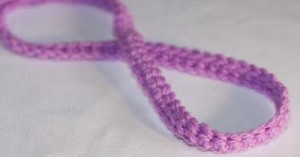
I started by doing a Slip Knot. Then I crocheted 70 chain stitches.

Chain 1, then skip 1 chain and single crochet into every chain. After making one row of single crochets, slip stitch both pieces together, but be sure not to twist it!

Then I started making Puff Stitches!.. I just love them, they always look so cute and are so fun to make!

Start of by chaining 3, then crochet a Puff Stitch into the next stitch. Chain 2, skip 1 stitch then crochet a puff stitch. Continue doing this all the way around.
After making 19 rows of puff stitch, I ended it off. Then taking my wool needle I sewed together the bottom of the ‘round pouch’.

image046

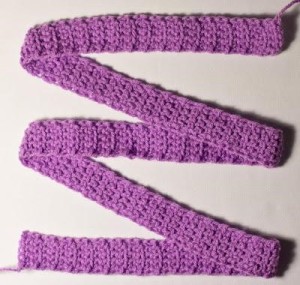
Now it was time to get started on the strap. I made 6 chain stitches.

image048

I then started crocheting single crochets till the strap measured 125cm.
Taking your wool needle again, attach the long strap to either side of the bag.

gevonden op: myfavouritethingsblog.com

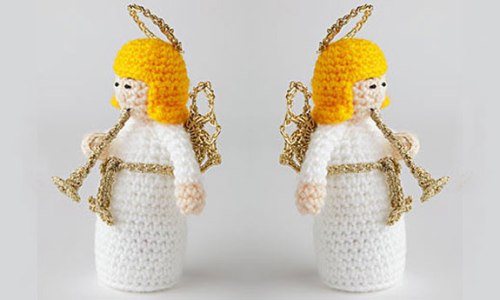
Gehaakte Kerststal

Als je nog even tijd hebt voor Kerstmis.
2014-kerststal1
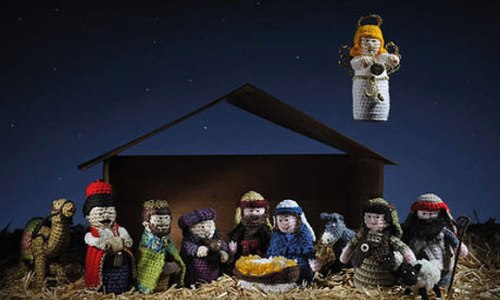
Hier de speciale gehaakte Kerststal!

2014-kerststal2
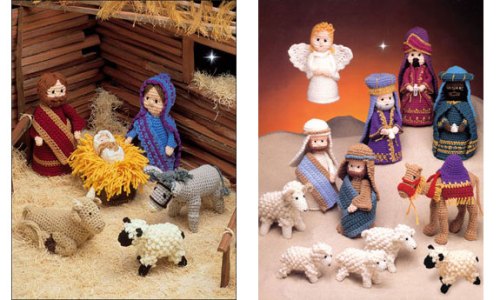
De geboorte van deze Kerststal is perfect voor het toevoegen van een magische feestelijk gevoel aan uw huis.

2014-kerststal3
Met het engelen patroon en een beetje creativiteit, kunt u uw eigen Mary, Jezus en Joseph, plus twee herders, de drie koningen, plus de engel zelf maken.

Het engelen patroon is volledig gratis en
hier te downloaden.

2014-kerststal4

Het patroon is helaas wel in het Engels.
De andere patronen zijn te koop in Amerikaanse blad Zinio.

A nylon thread necklace

Embroidery threads are not just for stitching and sewing – they have the potential to become statement necklaces using just a few techniques! Make this multi-coloured DIY necklace,  for yourself or gift to a friend.

You will need:

• Anchor Style threads in 8930 (Fiesta mix) or various colours, 315m
• Anchor Style threads in 8930 (Fiesta mix), 3m
• Tape measure
• Pair of Milward scissors
• One Milward Chenille needle (size 18)

image004

Step 1
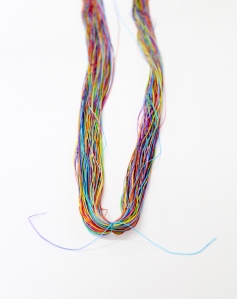
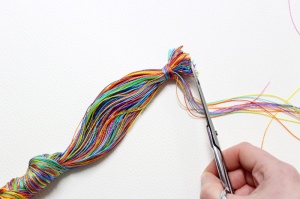
Cut 137 lengths of Anchor thread each measuring 2.3m. Fold the threads in half and tie using a 10cm length of thread so that they’re secured.

image005

Step 2
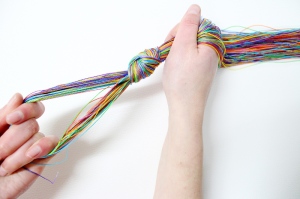
Leaving approximately 10cm from the fold, then tie a knot in the threads.

image006

Step 3
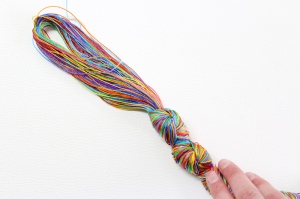
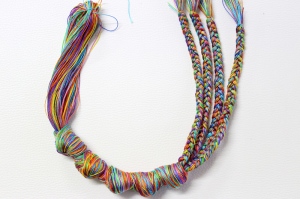
Tie 4 more knots snug up against each other. Remember to pull the threads taught when tying your knots so that they remain neat.

image007

Step 4
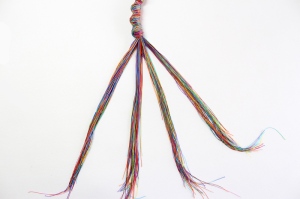
Split the rest of the threads in 4 equal parts.

image008

Step 5
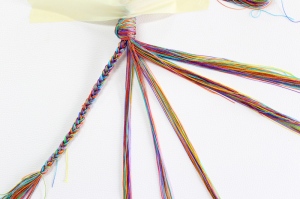
Braid each section with a simple plait and tie with a piece of thread to secure.

image009

image010

Step 6
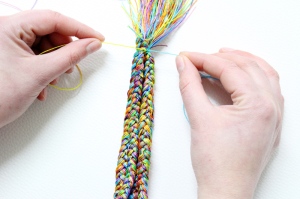
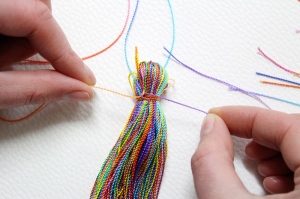
Cut a 40cm length of thread, wrap it around all the braids 3 times tightly and tie.

image011

Step 7
Cut another 2m thread and fold it in half twice. Wrap it around the other end of the necklace then tie with a double knot.

image012

image013

Step 8
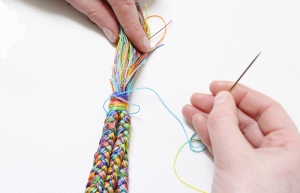
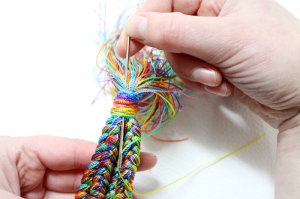
Thread an additional 50cm piece through your needle and wrap it around the braids several times as to cover the knot you made previously. Tie with a double knot. Pass the needle under and pull until it feels secure. Do the same on the other end of the necklace.

image014

image015

Step 9
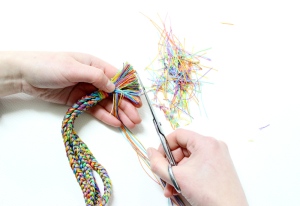
Leaving ten long threads on either side, trim the ends on either side of the necklace.

image003

gevonden op: makeitcoats.com